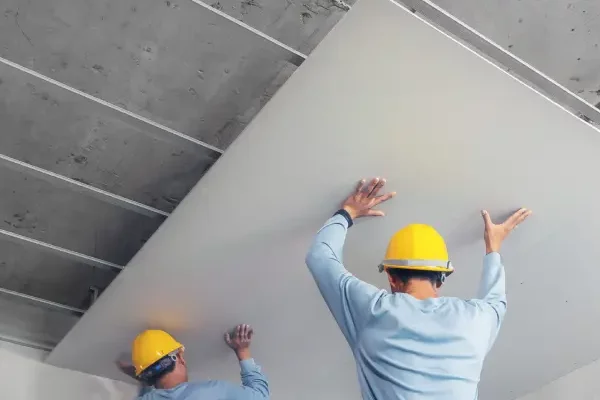
When it comes to renovating your home or office space in Miami-Dade County, Broward County, or Palm Beach County, drywall installation is often an essential part of the process. Properly installed drywall not only enhances the aesthetics of your space but also contributes to its structural integrity. However, to achieve a successful drywall installation project, it’s crucial to follow a meticulous checklist. In this article, we, at Global Contractors, will provide you with a comprehensive drywall installation checklist tailored for Miami and its surrounding areas.
The Importance of a Drywall Installation Checklist
Before diving into the checklist itself, let’s understand why having a checklist for your drywall installation project is so important. Drywall installation is a multi-step process that requires precision and attention to detail. Without a well-structured plan, you risk encountering costly mistakes and delays.
By following a comprehensive checklist, you can ensure that your drywall installation project in Miami goes smoothly and efficiently. It not only helps you stay organized but also serves as a reference point to ensure that each step is completed correctly.
Checklist Item 1: Evaluate Your Space
Before you begin your drywall installation project, assess the area where the installation will take place. Look for any existing issues such as water damage, mold, or structural problems. Addressing these issues before installing drywall is essential to prevent future complications.
Checklist Item 2: Obtain the Right Permits
In Miami and the surrounding counties, building permits are often required for construction projects, including drywall installation. Check with your local government or hire a professional contractor like Global Contractors to assist you in obtaining the necessary permits. This step ensures that your project complies with local regulations.
Checklist Item 3: Gather the Right Materials and Tools
To ensure a smooth drywall installation process, gather all the necessary materials and tools. This includes drywall sheets, joint compound, screws, corner beads, drywall tape, and the appropriate tools like a screw gun, trowel, and drywall saw.
Checklist Item 4: Measure and Cut Drywall Sheets
Accurate measurements are crucial when it comes to cutting drywall sheets to fit your space. Measure twice and cut once to avoid unnecessary wastage. Make sure to label each piece according to its intended location to prevent confusion during installation.
Checklist Item 5: Install Drywall Sheets
Start by installing the drywall sheets on the ceiling, working your way down to the walls. Use appropriate screws to secure the drywall sheets to the framing. Ensure that the sheets are level and that there are no gaps or bulges.
Checklist Item 6: Apply Joint Compound
After the drywall sheets are installed, it’s time to apply joint compound to cover the seams and screw holes. This step requires skill and patience. Multiple coats may be necessary, with sanding in between to achieve a smooth finish.
Checklist Item 7: Install Corner Beads
Corner beads are essential for protecting the corners of your walls and creating a clean, finished look. Secure them with joint compound and ensure they are perfectly straight.
Checklist Item 8: Tape and Mud
Using drywall tape, cover the seams between the drywall sheets. Apply joint compound over the tape, feathering the edges to create a seamless finish. Repeat this process for each seam, ensuring a uniform surface.
Checklist Item 9: Sand and Smooth
Once the joint compound is dry, sand the surface to create a smooth and even texture. Sanding is a critical step in achieving a professional-looking result. Be sure to wear appropriate safety gear during this process.
Checklist Item 10: Prime and Paint
After the surface is smooth, apply a primer to prepare it for painting. Choose high-quality paint in your desired color and apply it evenly. Multiple coats may be necessary for complete coverage.
Checklist Item 11: Clean Up
Properly dispose of all waste materials, including drywall scraps and used tools. Leave your workspace clean and free of debris.
Checklist Item 12: Inspect the Final Result
Before considering your drywall installation project complete, conduct a thorough inspection of the finished walls and ceiling. Look for any imperfections, such as cracks or uneven spots, and address them promptly.
Checklist Item 13: Seek Professional Assistance
If you’re unsure about any aspect of your drywall installation project in Miami, don’t hesitate to seek professional assistance. Global Contractors is here to help you with every step of the process, ensuring that your project meets the highest standards of quality.

A well-structured drywall installation checklist is indispensable for a successful project in Miami-Dade County, Broward County, or Palm Beach County. By following these steps and paying attention to detail, you can achieve a beautifully finished space that not only looks great but also stands the test of time. Remember that Global Contractors is always ready to assist you in your drywall installation needs, providing expertise and professionalism to ensure your project’s success.


